> ## Documentation Index
> Fetch the complete documentation index at: https://support.getproximate.app/llms.txt
> Use this file to discover all available pages before exploring further.
# Managing Your Proximate Subscription and Billing Settings
> Update your payment method or cancel your Proximate subscription anytime through the self-service billing portal at store.xpdynamics.com/billing.
Your paid Proximate subscription begins automatically after a 14-day free trial period. You can update your payment information, review your subscription details, or cancel at any time through the Proximate billing portal — no need to contact support for routine billing changes.
## Accessing the billing portal
Go to [store.xpdynamics.com/billing](https://store.xpdynamics.com/billing) to access your order and subscription details.
Enter the email address you used when placing your original order. You'll be sent a secure link to access your subscription and billing settings.
Not sure which email address you used? Message us with the help widget in the bottom-right corner, or email [**support@getproximate.app**](mailto:support@getproximate.app) and the team will help you locate your account.
## Updating your payment details
In the subscription details area, look for the row labeled **"Payment"**. There is an edit icon at the far-right end of the row.
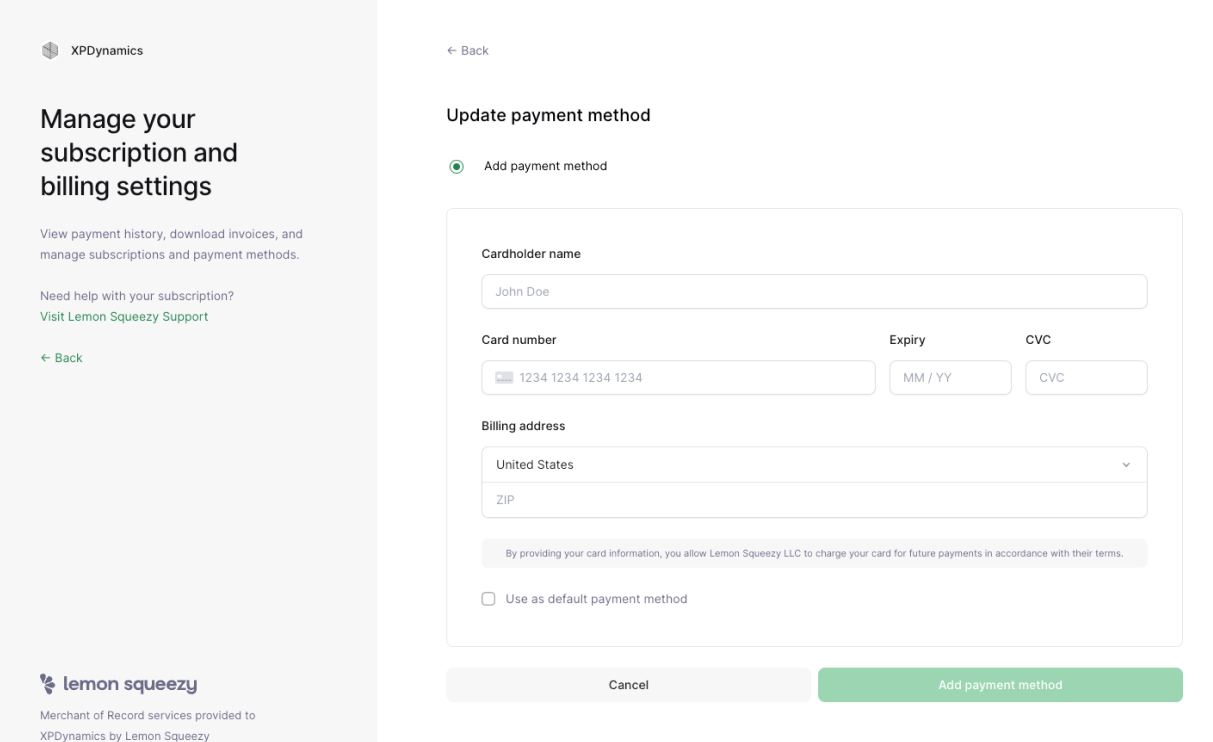
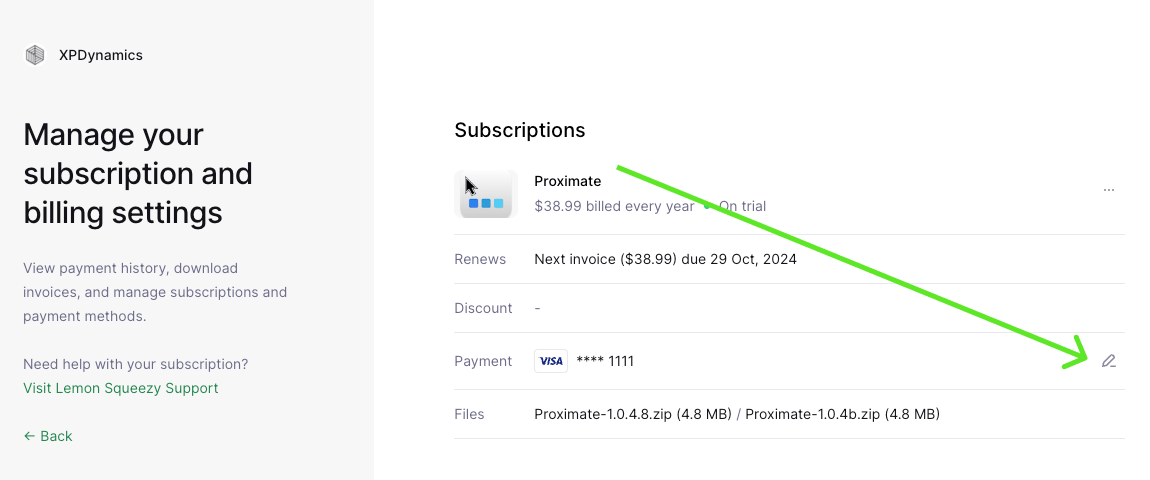 Click the edit icon and follow the prompts to add a new payment method or update an existing one.
 ## Cancelling your subscription
In the Subscriptions area of the billing portal, look to the right for a small icon showing **3 dots**.
## Cancelling your subscription
In the Subscriptions area of the billing portal, look to the right for a small icon showing **3 dots**.
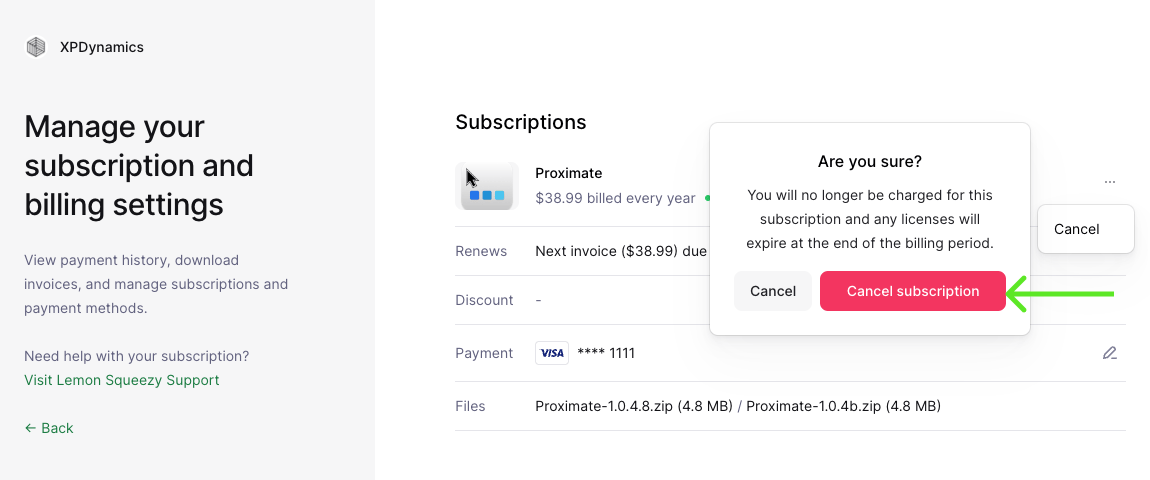
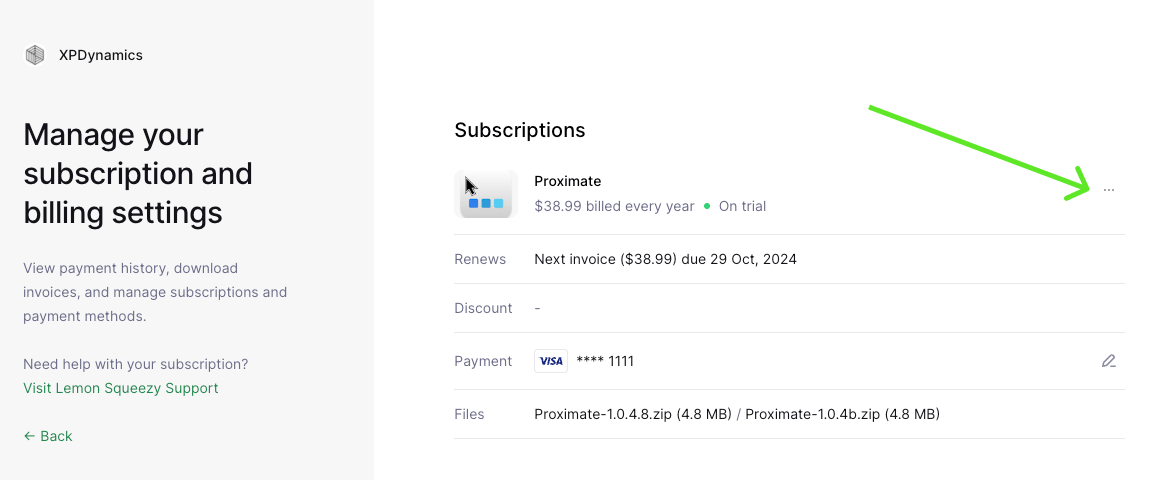 Click the 3-dot icon, then click **"Cancel"** from the menu that appears.
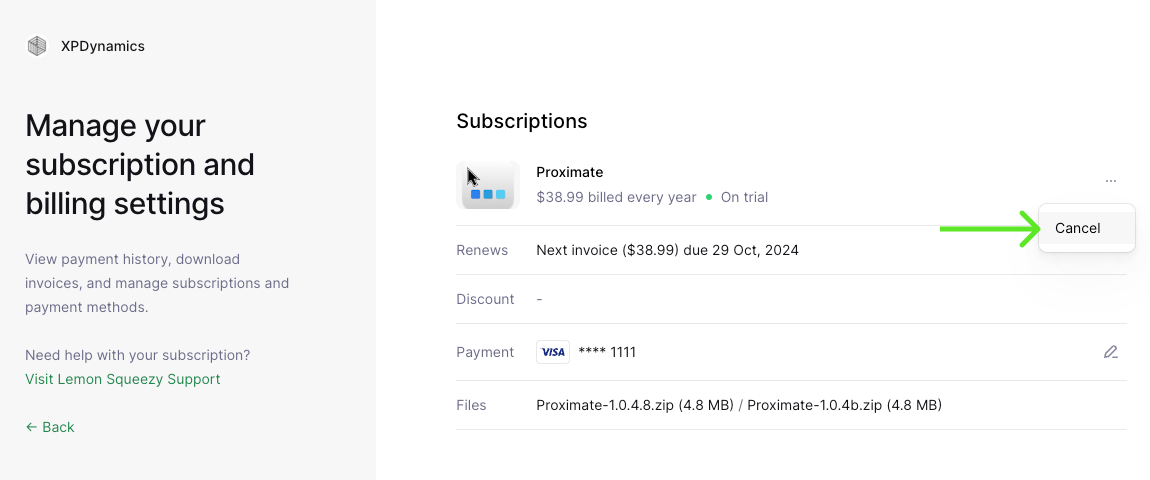 Follow the on-screen prompts to confirm your decision to cancel. Your subscription will remain active until the end of the current billing period.